I am really excited to finally be done with my craft room/office. I have been working on getting this room together for a while. When we moved into our home five years ago, this room started out as an office, then we decided to move the desk to the finished basement for the kids and make this room a guest room. The room is small, so a daybed was the only option which was fine. The room remained a guest space until my daughter outgrew her crib last year and we decided to give her the daybed rather than buy another bed for her.
So, once again, the room became fair game for something else. So, after many months of essentially being a hallway between the second floor, and our finished third floor attic, I decided to claim the room as my own!
The best part of the room, other than the energizing color of red that it is, is that it's in the front of the house which faces the south, and it gets a ton of sunlight all day long.
So, the journey evolved, and little by little I've been adding little touches to complete the space. In a previous
post, I showed you how I used this fabric to recover the lampshade on the desk, and also how I used mod podge to cover a
bud vase as an accent piece for the space. I once again used this method to recover a melamine tray that I had left over from summer.
 |
| Tray Before |
 |
| Tray After |
I used more of the fabric to make two skinny little runners. I placed one on the desk, and one of my new IKEA Expedit storage shelf. I was debating on what type of storage piece to put in here because there isn't much room except for under the large window. So, after searching for a while for something pretty and practical, I opted for this 8 cube piece from IKEA which was affordable and has enough space for my magazines and books and for any display pieces.


As you can see the window in this room is very tall. Many people don't know this, but when you have a large palladium (arch) window like this one, you should never hang a curtain rod in the middle of the window. At least this is what I have learned from all the research I've done about windows and designing around them. The curtain needs to extend way above to the top of the arch. This way the window is not "cut in half." It just doesn't look right the other way anyway in my opinion. Anyways....I needed to have a 122 inch long panel, which is really long and expensive to have to order. So, I decided to just jump in with both feet and make my own panels. It wasn't really difficult at all...just ironing the hems all the way around, and sewing a straight line...really easy beginner project. Sorry, no step by step tutorial. I promise that I will get better at doing that sort of stuff. For now, I'm just glad to be sharing all these finished projects!


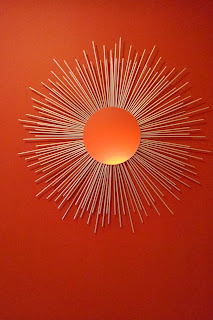
Ok...the finally DIY project accomplished in this room is the starburst mirror on the wall. I have seen a ton of these all over blogland, and I really love this look. So, I followed the tutorial that Stephanie Lynn gives on
Under the Table Dreaming,
here. I don't know if it was the lighting or what, but the mirror reflection in this picture looks really orange, which make it look even more like an actual sun. Cool huh?
So, that's my craft room/office....my mom cave...whatever room! I love it and couldn't be happier to have a space to myself to blog, to create, to read, to ENJOY! Have a great weekend!
Gina


